There are so many ways to compost it's not funny anymore.
Closed bins, open bins, pit, tumbler, bokashi, worm farm, windrow, hot pile, cold pile and we can go on for a bit.
Then there’s the potential issues, too dry, too wet, too hot, not hot enough, odour etc.
For good quality compost apart from the right ingredients you have to put in some effort and we managed to do so. We soon realised that turning compost is a bloody good exercise and takes up a significant amount of space. Let’s put it in a cage to create more space Elain Ingham (soil food web) style, ugh there’s that turning again.

To turn or not to turn, that was our question.
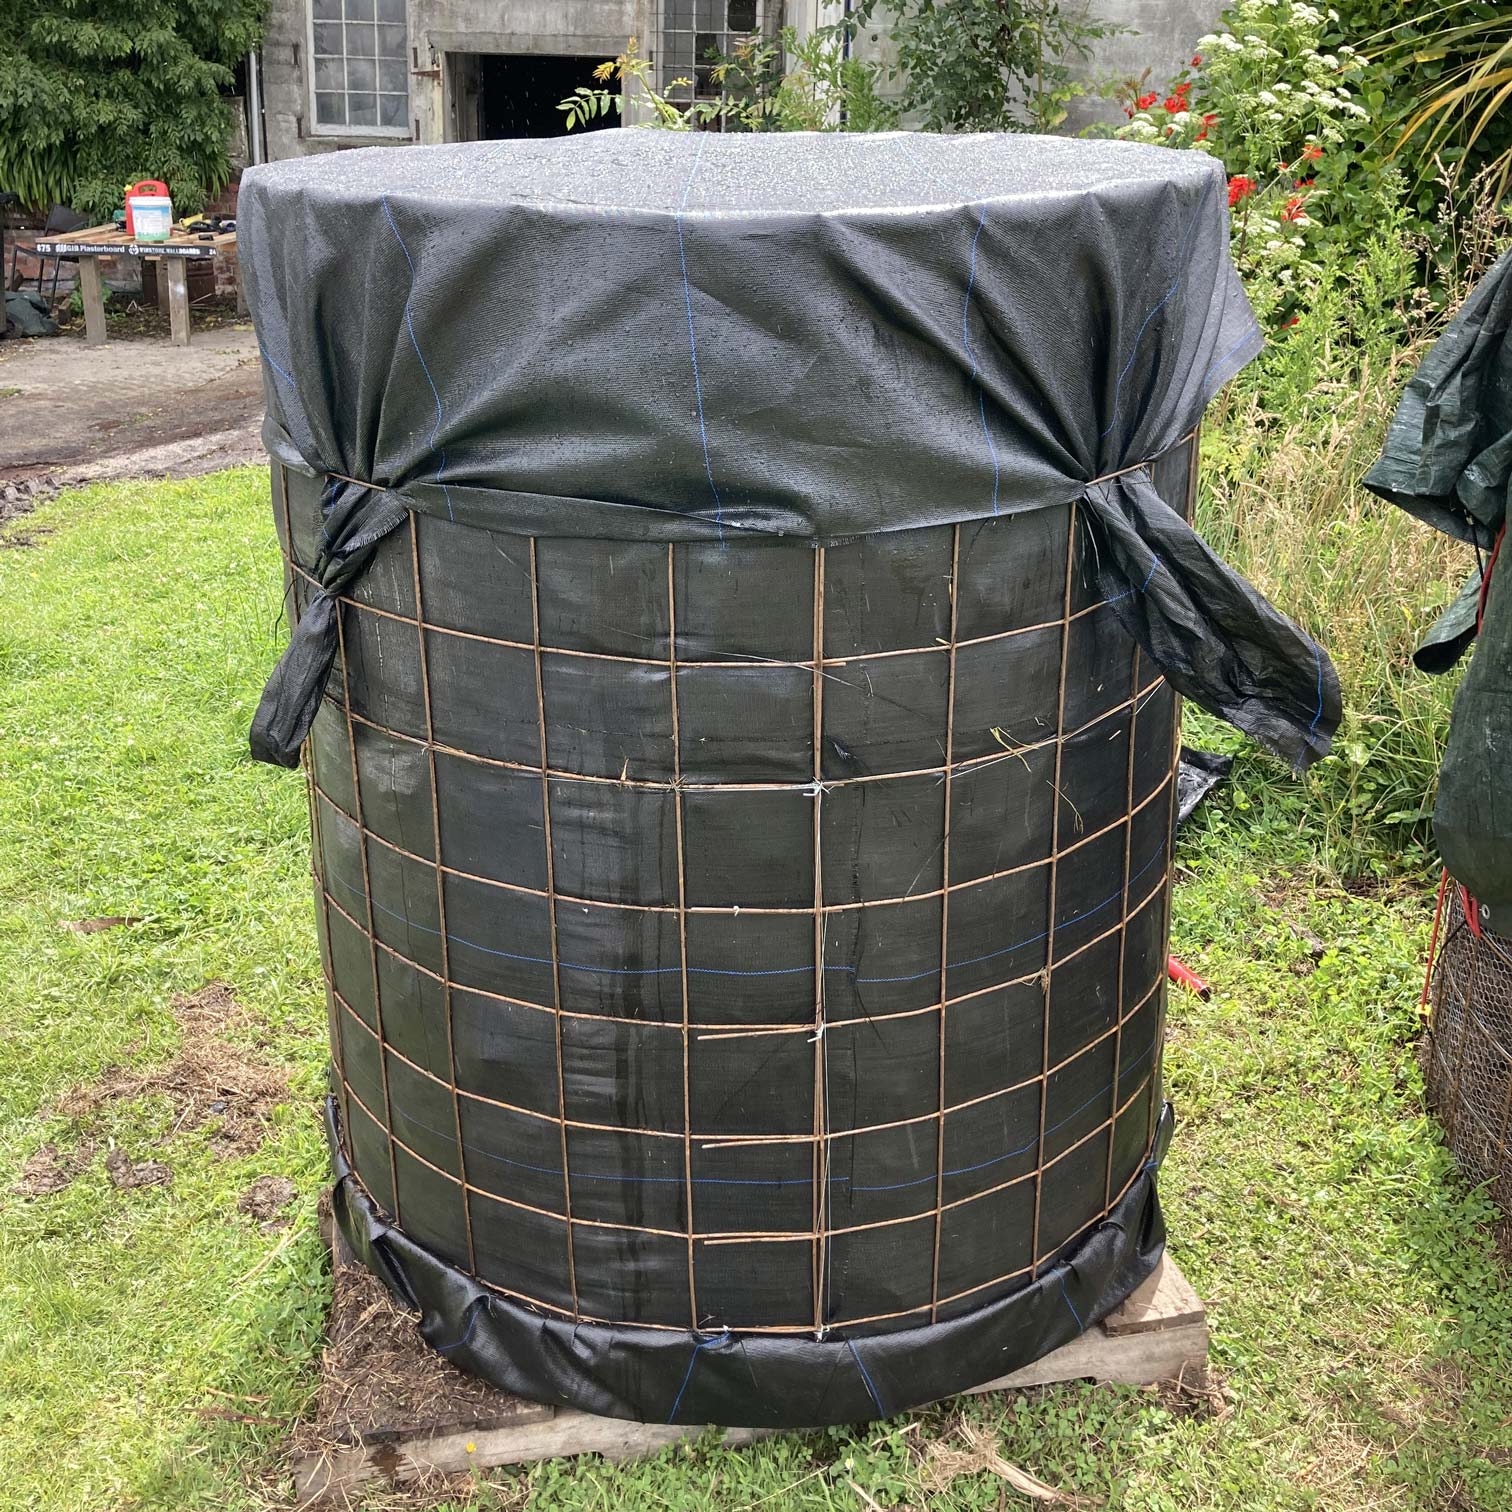
A Johnson-Su bioreactor. Sounds good but what is it? A wrapped cage on a pallet and apparently when built and maintained correctly, the static pile Johnson-Su bioreactor never needs turning, never has smells, and does not attract flies. This reactor design allows the material to be composted aerobically because all of the compost in the reactor is within 30cm of ambient air, allowing complete biological breakdown of compost materials and resulting in a microbially diverse, fungal- dominant compost product. Feed materials for Johnson-Su bioreactors can vary widely. The first mixes he used were one-third by volume each of dairy manure, yard waste/leaves, and wood chips (smaller then 10mm). You can use entirely leaves if you like, or you can add other materials that you may have available. This sounded so good we had to try one out. Being able to incorporate a lot of our own organic amendments like humate, paramagnetic basalt rock dust, fish bone meal, fish meal, amino acids, flax seed meal, neem meal and superfine ag lime sparked our interest, and this reactor could save us a heap of effort, space and time so we followed the instructions and tried one out. Those instructions flew out the window pretty quick and by the second one we got the hang of it and wanted to share that with you.
Johnson-Su Bioreactor - Seacliff Organics NZ from Seacliff Organics - NZ on Vimeo.
There are one hundred and one ways to do this and the instructions below are how I ended up doing it but each to their own. Without the stops to take photos to show it to you it would take me 2hrs max to build the reactor. Collecting the materials, shredding them and filling the reactor is a different story but the whole process can be done in a good day’s work.
Let’s get down to business....
Safety first...
Materials
-
Landscape cloth (woven, minimum 5 oz.):
- Piece One: 4m
- Piece Two: 1.8m x 1.8m
- Piece Three: 1.8m x 1.8m
-
One standard, sturdy shipping pallet with dimensions of approximately 1m x 1.2m. Make sure its heat treated and not fumigated (some old ones in circulation can be fumigated) look for the HT stamp
-
Reinforcing mesh (re-mesh 150mm x150mm squares), used to create a 1.5m x 3.9m supporting wire cage. This type of re-mesh is normally used for reinforcing concrete.
-
Four 3m lengths of 100mm diameter pvc pipe with bell ends
-
PVC glue
-
Tie wire (normally used to tie rebar together)
-
Hose and 3x T-junctions to make irrigation
-
4 brackets and screws to secure the cage to the pallet
-
Optional: A sheet of ply 75cm x 75cm for template
-
Optional: A jig to hold the pvc pipes in place as you fill the Johnson-Su bioreactor. If you have helpers or if you are willing to adjust the pipes as you fill the bioreactor, you will not need the jig.
Tools
-
Grinder (earmuffs and safety glasses) or bolt cutter
-
Jigsaw or drill with 114mm holesaw
-
16mm hole saw or similar size drillbit for the pvc holes (no smaller then 10mm)
-
Impact driver (to secure the cage to the pallet)
-
Pliers
-
Sidecutters
-
Scissors or stanley knife
-
Stapler
-
Measuring tape
-
Pencil or vivid
-
Something to sow the cloth to the cage ( I used a bend nail with a hole drilled in it)
-
Piece of string (i’m not sure how long)
Let’s break it down!
With scissors or stanley knife, cut 4m (for the cage) and 2x 1.8m (bottom and top) from your 1.8m wide landscape cloth.
Use your grinder or bolt cutters to grind or cut the re-mesh 3.9m long (26 full squares) and 1.5m high (10 full squares).
I found it helpful to grind the 3.9m side flush to be able to tighten up the cloth and to secure the cage to the pallet. The “factory cut” on the other 3.9m came in handy to hook the cloth on. Grab yourself 4 brackets with screws and secure your string to your sowing tool. 
Preshape the re-mesh so there is less tention on it when you bring the ends together. 
Lay the 4m cloth on top of the re-mesh so that you have equal length overhanging top and bottom.
Start at the top edge (edge with the “factory cut”) and fold the cloth under the re-mesh. You can pull/push the little steel bits through the cloth, making sure you keep the same overhang over the whole length. Use your sowing tool to secure the cloth to the re-mesh following the whole length (that bent nail did the trick nicely). Tie off both ends and swap to the bottom side. 
Fold the cloth under the re-mesh and secure to the re-mesh 150mm up (at the re-mesh cross). Repeat on the other side. With just securing both ends you can pull the cloth tight from the outside once the cage is tied together (saved me some sowing). 
Bring the two ends together, overlap the re-mesh 150mm, use tie wire to secure it in the middle first, then tie off every 150mm at the overlap. Sow the cloth that is on the outside of the cage to the cloth inside the cage to prevent air draft and work your way all the way up. 
This template is handy for drilling the holes, applying pressure on the cloth while cutting the holes, to size the irrigation ring and to create the jig to hold the pvc pipes in place. I used a 114mm hole saw which is the correct size for 100mm pvc pipe. Feel free to use a jigsaw.
Place the template with the centre hole on the centre of the pallet. Spin the template and see if you can position it so the outside holes do not fully cut a plank (saves you patching up one).
Drill the holes in the pallet with the holesaw or mark the holes and use a jigsaw. Fold your bottom cloth as depicted, place the centre on the pallet centre and fold open. You can use the template to apply pressure on the cloth when cutting the holes. Staple the cloth to the pallet around the holes so it does not move when you are positioning the cage. 
Mark the four corners 60cm from the centre hole. The 60cm is oversized so that you can still see the marks once the cage is on the pallet. Time to put two and two together. Put the cage on the pallet, roughly centre it and now you can pull the cage cloth tight from the outside at the bottom. Use your brackets to secure the four corners, just pay attention that the cage is evenly spaced from the marks before securing it to the pallet. Pull the bottom cloth up against the cage, start 150mm up and cut the cloth all the way up at each vertical so you can fold the bottom cloth into the cage. 
Use the template to size the irrigation rings and connect them together with two T-junctions and put one T-junction in that connection pipe for the water supply.
You can use an offcut from the re-mesh to create a pvc support system.
Cut the bell ends of your pvc pipes so you have got four 1.8m straight bits. Glue two bell ends pieces together and create another two pieces of 1.8m. Drill some holes on both sides of the pipes for aeration during the first 24hrs. I ended up using the left over pvc to make tapered covers so that material would not get caught up on the pvc edge while filling. You can drill some smaller holes at the top of the pvc pipes to secure a loop so you have got something in place when you need to lift the pipes out (I used some high tensile wire).

Put your “pvc pipe in place holder jig” on the cage and make sure the holes line up with the bottom holes. Place your pvc pipes in the bottom holes and secure them to the jig so they can not move. Time to get physical. In the original instructions you presoak the material in a waterbath for 60 sec and then let it drain with the help of a wheelbarrow that is stood up so the water can drain back into the waterbath. That was way to time consuming so we irrigated our material overnight with dripline so the next day it was ready to go in. Fill her up to the top, make sure you fluff it up when it goes in and once filled get rid of the jig and cover the cage with your top cloth. You can pull the four corners down and through the mesh of the cage to secure it. 24hrs later you can pull the pipes out, place your irrigation, connect to your water supply and cover the cage again. The irrigation run time would depend on what type of irrigation you have used. If its a hose with multiple holes poked into it one minute per day could be sufficient but keep an eye on it for the first week. Too dry, more water. Water coming out the bottom of the cage, less water. Bob’s your uncle!

You only have to make the template, jig and pvc pipes once for any future reactors or for after 12months when it is a finished product you can reuse everthing to create another one. It is a space saver for sure, can be moved around with a forklift and there is a lot of time and effort saved with the no tilling.
Now It will be a 12 month wait to see if this method creates a microbially diverse, fungal- dominant compost that is up to our standards.
Full credit goes out to Dr, David Johnson and his instructions on how to make your own bioreactor and the bioreactor registry results which got us curious as to what potentially could be the end product in 12 months time.
Hope you enjoyed it and we will keep you updated.
-Pierre
FAQs
What is a Johnson-Su bioreactor?
A Johnson-Su bioreactor is a composting system that consists of a wrapped cage on a pallet, designed to compost materials aerobically without the need for turning.
What are the advantages of using a Johnson-Su bioreactor for composting?
The advantages of using a Johnson-Su bioreactor for composting include the elimination of the need to turn the compost, absence of odors and flies, efficient breakdown of compost materials, and the potential to create a microbially diverse, fungal-dominant compost product.

Hey! Thank you for sharing this! Question: did you spend a lot of time chipping and shredding your material before hand? Any recommendations on efficiently prepping all the material you add to the bioreactor? Thanks!
Great to see this in action, thanks for sharing your experience and knowledge. Half way there, I will be watching late summer for the revel.